> ## Documentation Index
> Fetch the complete documentation index at: https://docs.jaksam-scripts.com/llms.txt
> Use this file to discover all available pages before exploring further.

# Cómo usar sprites personalizados

> Reemplaza los sprites de blips predeterminados por tus propios íconos personalizados.

Blips Creator ofrece una forma extremadamente sencilla de reemplazar los sprites de los blips.

<Steps>
  <Step title="Elige un ícono">
    Elige un ícono `.png` que quieras usar (64x64px es lo mejor).
  </Step>

  <Step title="Abre la carpeta de sprites">
    Ve a la carpeta `blips_creator/_sprites/REPLACEABLE`.
  </Step>

  <Step title="Marca el sprite a reemplazar">
    Elige un sprite para reemplazar, copia su nombre y añade un `#` antes del nombre (para que sea más fácil de encontrar más adelante si lo necesitas).
  </Step>

  <Step title="Añade tu ícono">
    Coloca el nuevo ícono con el mismo nombre que el sprite anterior.
  </Step>

  <Step title="Reinicia el script">
    Reinicia Blips Creator **2 veces**.
  </Step>
</Steps>

## Ejemplo con imágenes

En este ejemplo, el logo verde se reemplaza por el sprite rojo.

<Frame caption="Carpeta blips_creator/_sprites/REPLACEABLE">
  <img src="https://mintcdn.com/jaksam/cS_rA3IcGZ7NTj0G/images/immagine-1.png?fit=max&auto=format&n=cS_rA3IcGZ7NTj0G&q=85&s=277241607f987b7cb18392d6ac46060a" alt="REPLACEABLE folder" width="1600" height="184" data-path="images/immagine-1.png" />
</Frame>

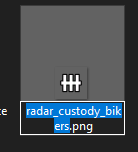
<Frame caption="Copia el nombre del archivo">
  <img src="https://mintcdn.com/jaksam/cS_rA3IcGZ7NTj0G/images/immagine-8.png?fit=max&auto=format&n=cS_rA3IcGZ7NTj0G&q=85&s=ce6deab968df1ccbbc03e188d9dacbbb" alt="Copy the file name" width="138" height="152" data-path="images/immagine-8.png" />
</Frame>

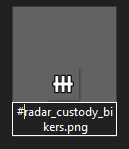
<Frame caption="Añade un &#x22;#&#x22; antes del nombre">
  <img src="https://mintcdn.com/jaksam/cS_rA3IcGZ7NTj0G/images/immagine-2.png?fit=max&auto=format&n=cS_rA3IcGZ7NTj0G&q=85&s=08a8abeb31ca9d87bab45b92a83048fc" alt="Add a hash before the name" width="129" height="149" data-path="images/immagine-2.png" />
</Frame>

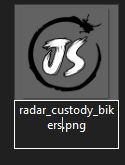
<Frame caption="Renombra el archivo de tu nuevo ícono">
  <img src="https://mintcdn.com/jaksam/cS_rA3IcGZ7NTj0G/images/immagine-4.png?fit=max&auto=format&n=cS_rA3IcGZ7NTj0G&q=85&s=012d2de492ecdb9e77948485d7177aac" alt="Rename the new icon file" width="125" height="165" data-path="images/immagine-4.png" />
</Frame>

<Frame caption="Resultado final">
  <img src="https://mintcdn.com/jaksam/cS_rA3IcGZ7NTj0G/images/immagine-7.png?fit=max&auto=format&n=cS_rA3IcGZ7NTj0G&q=85&s=27423834d75620eec04a5dc356b31cf3" alt="Final result" width="1630" height="185" data-path="images/immagine-7.png" />
</Frame>

Ahora reinicia el script **2 veces** y el sprite quedará actualizado.


This documentation is built and hosted on [Mintlify](https://mintlify.com), a developer documentation platform.